 +
+
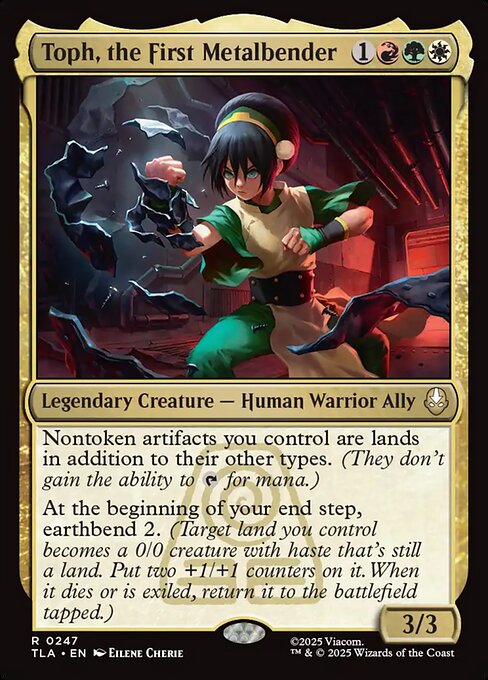
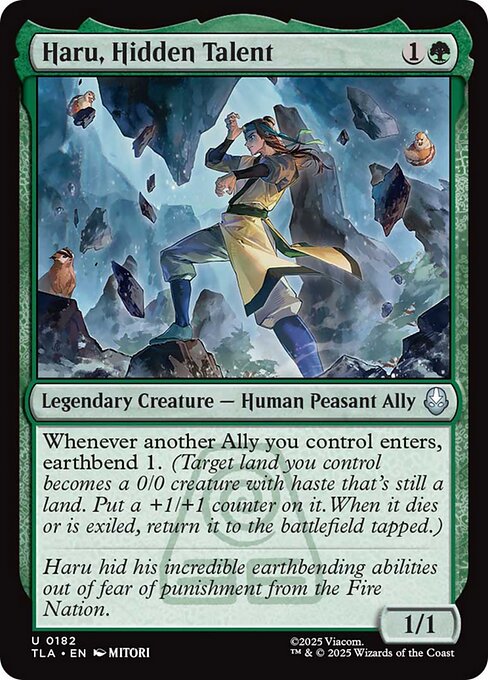
Haru, Hidden Talent + Toph, the First Metalbender Combos
20 known combos featuring both cards in Commander
Infinite landfall triggers
Infinite ETB
Infinite LTB
Infinite sacrifice triggers
Infinite death triggers
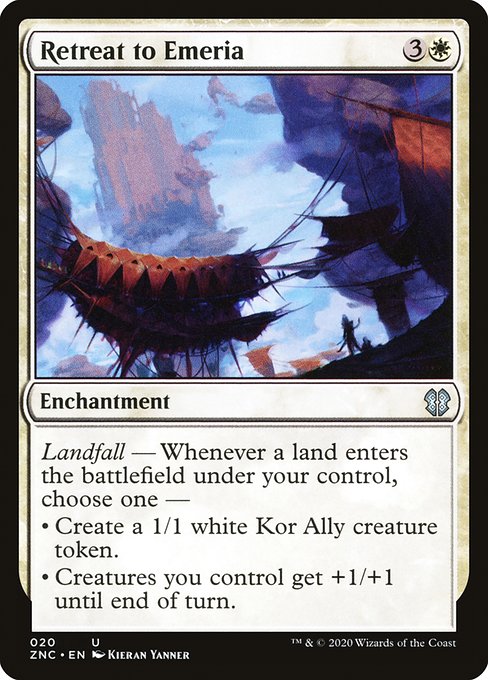
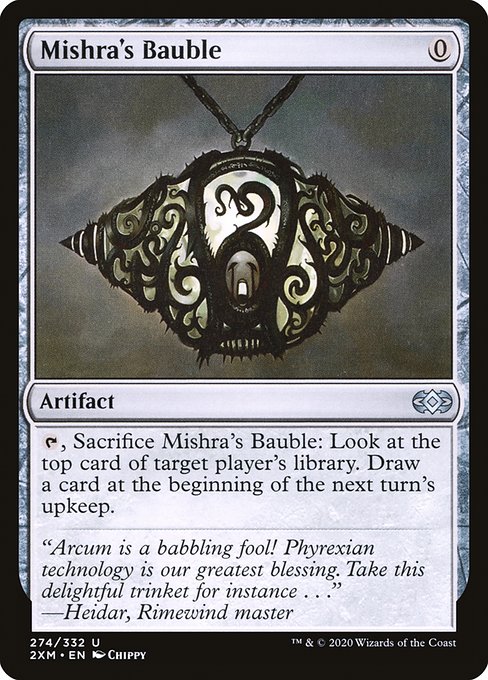
Combo 1 with Retreat to Emeria + Mishra's Bauble
Results:
Infinite ETB
· Infinite card draw at the beginning of the next upkeep
· Infinite creature tokens
· Infinite draw triggers at the beginning of the next upkeep
· Infinite landfall triggers
Steps
- Cast Mishra's Bauble by paying its mana cost.
- When Mishra's Bauble enters, Retreat to Emeria triggers, creating a 1/1 Kor Ally creature token.
- When the Kor Ally enters, Haru triggers, earthbending Mishra's Bauble.
- Activate Mishra's Bauble by tapping and sacrificing it.
- Haru triggers, returning Mishra's Bauble from your graveyard to the battlefield.
- Repeat steps 2 and 3 once.
- Resolve the Mishra's Bauble ability from step 4.
- Repeat from step 4.
Combo 2 with Retreat to Emeria + Lotus Petal
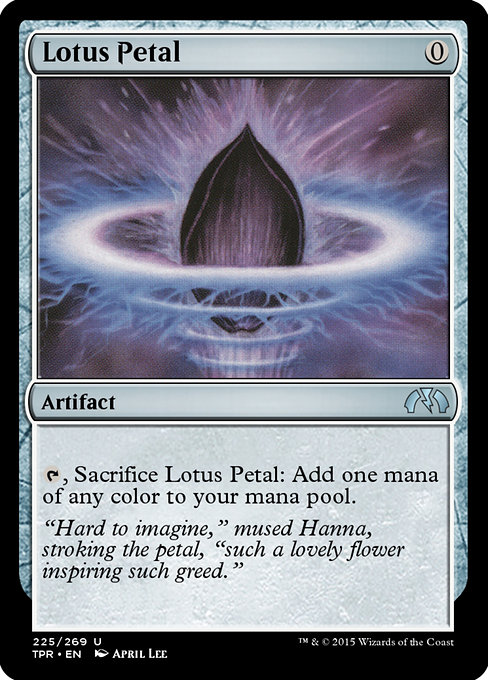
Results:
Infinite ETB
· Infinite colored mana
· Infinite creature tokens
· Infinite landfall triggers
Show steps
- Cast Lotus Petal by paying its mana cost.
- When Lotus Petal enters, Retreat to Emeria triggers, creating a 1/1 Kor Ally creature token.
- When the Kor Ally enters, Haru triggers, earthbending Lotus Petal.
- Activate Lotus Petal by tapping and sacrificing it.
- Haru triggers, returning Lotus Petal from your graveyard to the battlefield.
- Repeat from step 2
Combo 3 with Retreat to Emeria + Tormod's Crypt
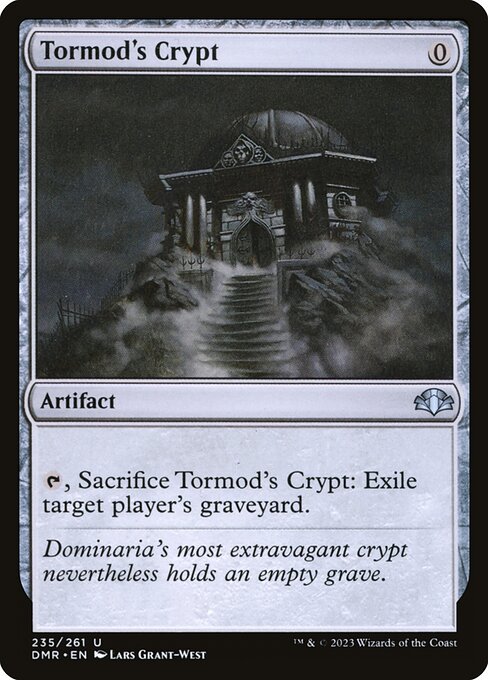
Results:
Infinite ETB
· Infinite creature tokens
· Infinite landfall triggers
Show steps
- Cast Tormod's Crypt by paying its mana cost.
- When Tormod's Crypt enters, Retreat to Emeria triggers, creating a 1/1 Kor Ally creature token.
- When the Kor Ally enters, Haru triggers, earthbending Tormod's Crypt.
- Activate Tormod's Crypt by tapping and sacrificing it.
- Haru triggers, returning Tormod's Crypt from your graveyard to the battlefield.
- Repeat steps 2 and 3 once.
- Resolve the Tormod's Crypt ability from step 4.
- Repeat from step 4.
Combo 4 with Retreat to Emeria + Urza's Bauble
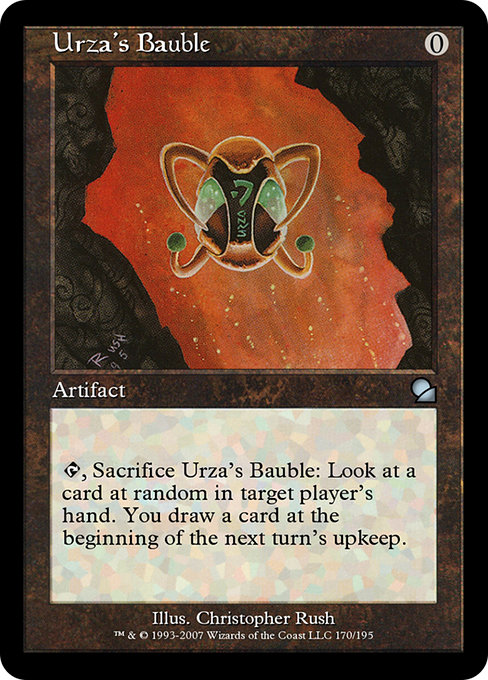
Results:
Infinite ETB
· Infinite card draw at the beginning of the next upkeep
· Infinite creature tokens
· Infinite draw triggers at the beginning of the next upkeep
· Infinite landfall triggers
Show steps
- Cast Urza's Bauble by paying its mana cost.
- When Urza's Bauble enters, Retreat to Emeria triggers, creating a 1/1 Kor Ally creature token.
- When the Kor Ally enters, Haru triggers, earthbending Urza's Bauble.
- Activate Urza's Bauble by tapping and sacrificing it.
- Haru triggers, returning Urza's Bauble from your graveyard to the battlefield.
- Repeat steps 2 and 3 once.
- Resolve the Urza's Bauble ability from step 4.
- Repeat from step 4.
Combo 5 with Retreat to Emeria + Welding Jar
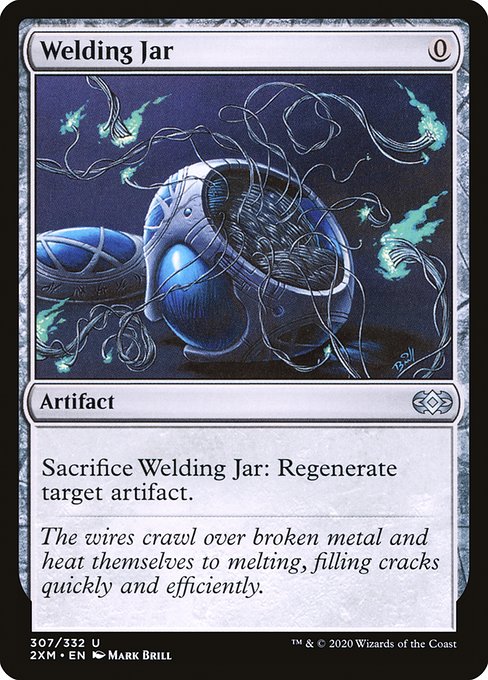
Results:
Infinite ETB
· Infinite creature tokens
· Infinite landfall triggers
Show steps
- Cast Welding Jar by paying its mana cost.
- When Welding Jar enters, Retreat to Emeria triggers, creating a 1/1 Kor Ally creature token.
- When the Kor Ally enters, Haru triggers, earthbending Welding Jar.
- Activate Welding Jar by sacrificing it.
- Haru triggers, returning Welding Jar from your graveyard to the battlefield.
- Repeat steps 2 and 3 once.
- Resolve the Welding Jar ability from step 4.
- Repeat from step 4.
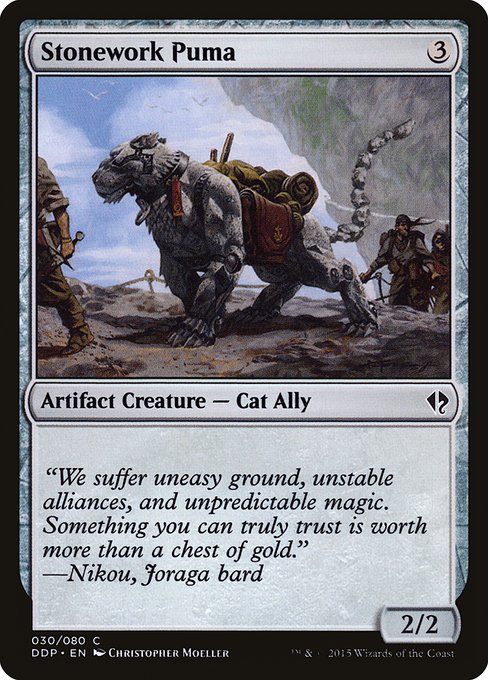
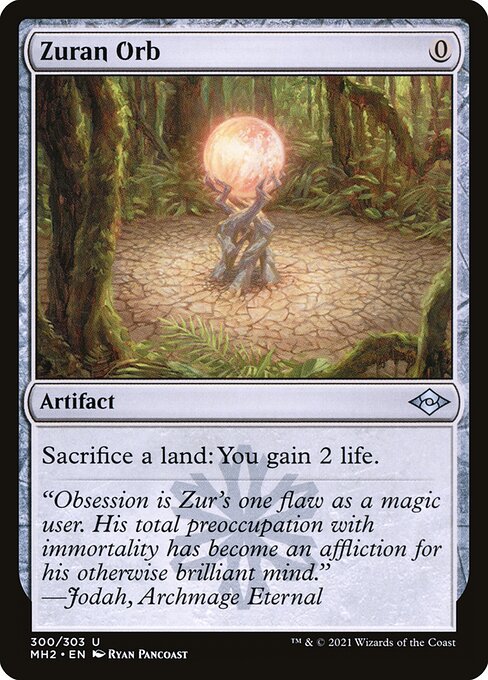
Combo 6 with Stonework Puma + Zuran Orb
Results:
Infinite LTB
· Infinite ETB
· Infinite sacrifice triggers
· Infinite death triggers
· Infinite landfall triggers
· Infinite lifegain triggers
· Infinite lifegain
Show steps
- Cast Stonework Puma by paying {3}.
- When Stonework Puma enters, Haru triggers, targeting Stonework Puma as it is a land due to Toph.
- Activate Zuran Orb by sacrificing Stonework Puma.
- When Stonework Puma dies, Haru triggers, returning Stonework Puma from your graveyard to the battlefield tapped.
- When Stonework Puma enters, Haru triggers, targeting Stonework Puma as it is a land due to Toph.
- Resolve the Zuran Orb ability.
- Repeat from step 3.
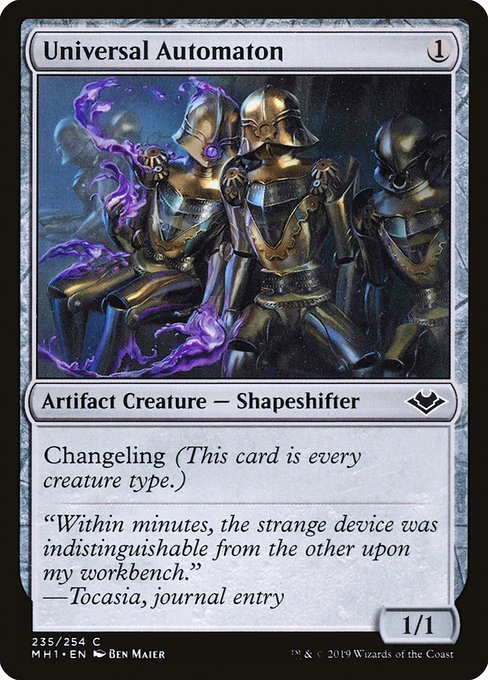
Combo 7 with Zuran Orb + Universal Automaton
Results:
Infinite LTB
· Infinite ETB
· Infinite sacrifice triggers
· Infinite death triggers
· Infinite lifegain triggers
· Infinite lifegain
· Infinite landfall triggers
Show steps
- Cast Universal Automaton by paying {1}.
- When Universal Automaton enters, Haru triggers, targeting Universal Automaton as it is a land due to Toph.
- Activate Zuran Orb by sacrificing Universal Automaton.
- When Universal Automaton dies, Haru triggers, returning Universal Automaton from your graveyard to the battlefield tapped.
- When Universal Automaton enters, Haru triggers, targeting Universal Automaton as it is a land due to Toph.
- Resolve the Zuran Orb ability.
- Repeat from step 3.
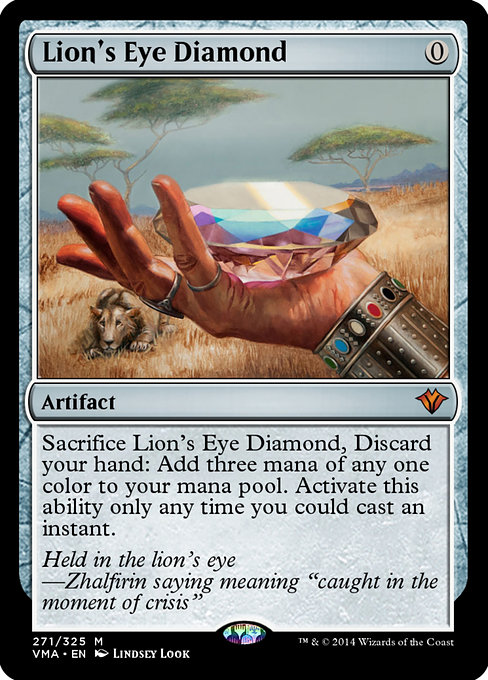
Combo 8 with Retreat to Emeria + Lion's Eye Diamond
Results:
Infinite ETB
· Infinite colored mana
· Infinite creature tokens
· Infinite landfall triggers
Show steps
- Cast Lion's Eye Diamond by paying its mana cost.
- When Lion's Eye Diamond enters, Retreat to Emeria triggers, creating a 1/1 Kor Ally creature token.
- When the Kor Ally enters, Haru triggers, earthbending Lion's Eye Diamond.
- Activate Lion's Eye Diamond by discarding your hand and sacrificing it.
- Haru triggers, returning Lion's Eye Diamond from your graveyard to the battlefield.
- Repeat from step 2
Combo 9 with Stonework Puma + Grinding Station
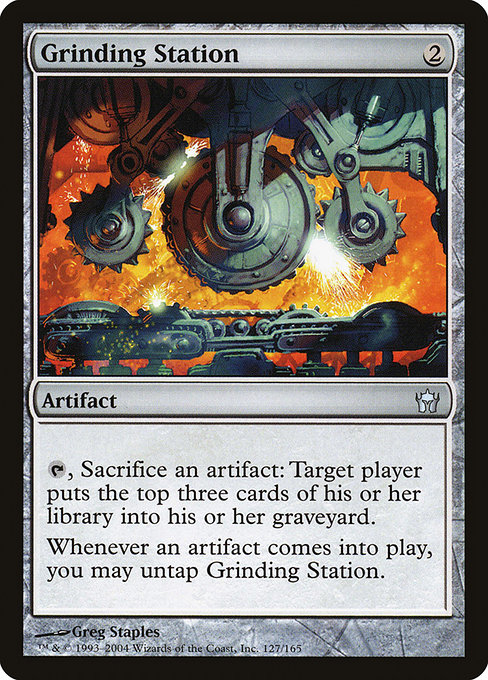
Results:
Infinite LTB
· Infinite ETB
· Infinite sacrifice triggers
· Infinite death triggers
· Infinite landfall triggers
· Infinite mill
· Infinite self-mill
Show steps
- Cast Stonework Puma by paying {3}.
- When Stonework Puma enters, Grinding Station and Haru trigger.
- Resolve the Haru trigger, targeting Stonework Puma as it is a land due to Toph.
- Resolve the Grinding Station trigger, untapping it.
- Activate Grinding Station by tapping it and sacrificing Stonework Puma.
- When Stonework Puma dies, Haru triggers, returning Stonework Puma from your graveyard to the battlefield tapped.
- When Stonework Puma enters, Grinding Station and Haru trigger.
- Resolve the Haru trigger, targeting Stonework Puma as it is a land due to Toph.
- Resolve the Grinding Station trigger, untapping it.
- Resolve the Grinding Station ability from step 5.
- Repeat from step 5.
Combo 10 with Stonework Puma + Sylvan Safekeeper
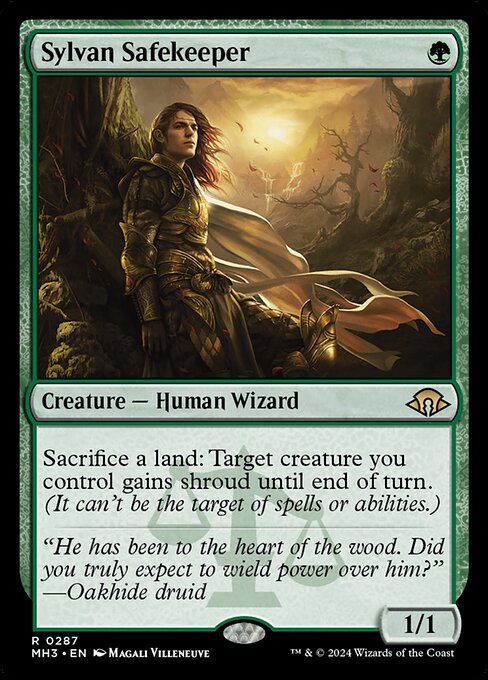
Results:
Infinite LTB
· Infinite ETB
· Infinite sacrifice triggers
· Infinite death triggers
· Infinite landfall triggers
Show steps
- Cast Stonework Puma by paying {3}.
- When Stonework Puma enters, Haru triggers, targeting Stonework Puma as it is a land due to Toph.
- Activate Sylvan Safekeeper by sacrificing Stonework Puma.
- When Stonework Puma dies, Haru triggers, returning Stonework Puma from your graveyard to the battlefield tapped.
- When Stonework Puma enters, Haru triggers, targeting Stonework Puma as it is a land due to Toph.
- Repeat from step 3.
- Resolve all Sylvan Safekeeper abilities.
Combo 11 with Zuran Orb + Three Tree Mascot
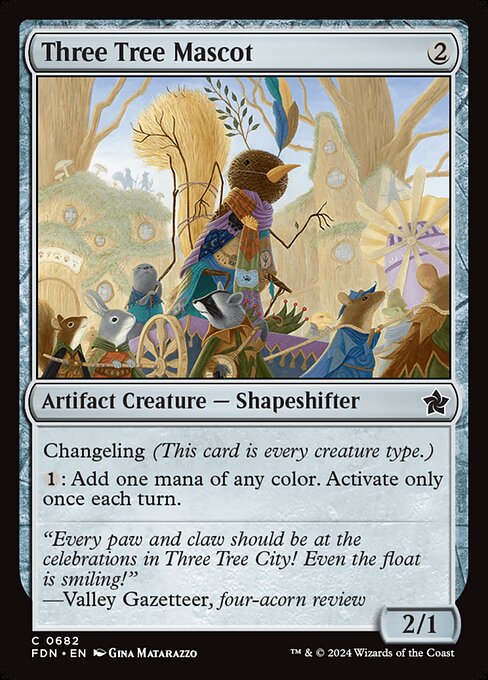
Results:
Infinite LTB
· Infinite ETB
· Infinite sacrifice triggers
· Infinite death triggers
· Infinite lifegain triggers
· Infinite lifegain
· Infinite landfall triggers
Show steps
- Cast Three Tree Mascot by paying {2}.
- When Three Tree Mascot enters, Haru triggers, targeting Three Tree Mascot as it is a land due to Toph.
- Activate Zuran Orb by sacrificing Three Tree Mascot.
- When Three Tree Mascot dies, Haru triggers, returning Three Tree Mascot from your graveyard to the battlefield tapped.
- When Three Tree Mascot enters, Haru triggers, targeting Three Tree Mascot as it is a land due to Toph.
- Resolve the Zuran Orb ability.
- Repeat from step 3.
Combo 12 with Stonework Puma + Krark-Clan Ironworks
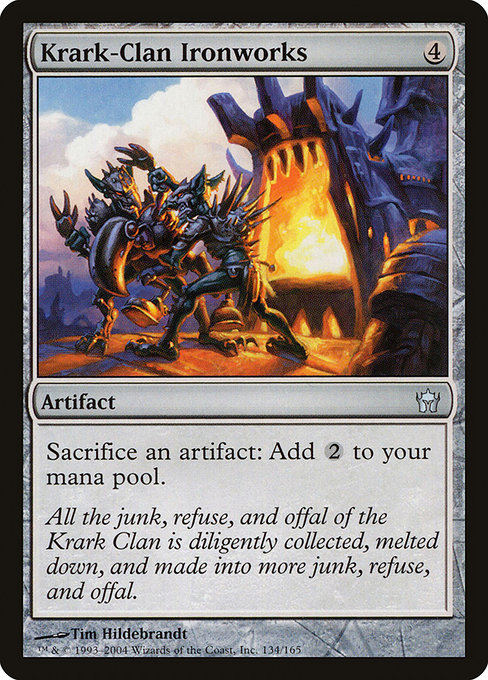
Results:
Infinite LTB
· Infinite ETB
· Infinite sacrifice triggers
· Infinite death triggers
· Infinite landfall triggers
· Infinite colorless mana
Show steps
- Cast Stonework Puma by paying {3}.
- When Stonework Puma enters, Haru triggers, targeting Stonework Puma as it is a land due to Toph.
- Activate Krark-Clan Ironworks by sacrificing Stonework Puma.
- When Stonework Puma dies, Haru triggers, returning Stonework Puma from your graveyard to the battlefield tapped.
- When Stonework Puma enters, Haru triggers, targeting Stonework Puma as it is a land due to Toph.
- Repeat from step 3.
Combo 13 with Stonework Puma + Ashnod's Altar
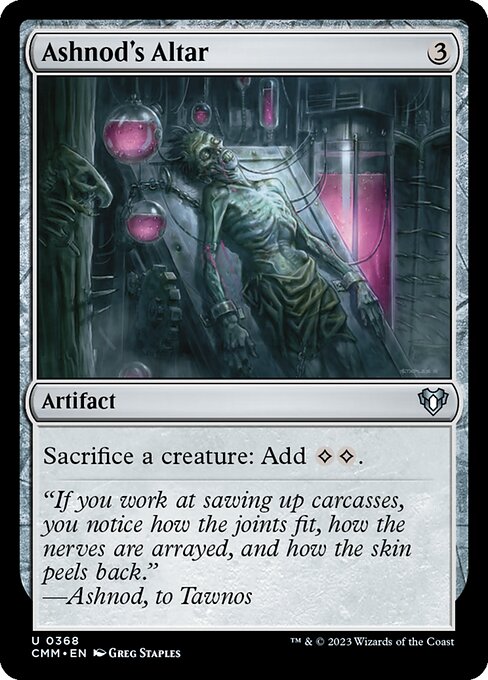
Results:
Infinite LTB
· Infinite ETB
· Infinite sacrifice triggers
· Infinite death triggers
· Infinite landfall triggers
· Infinite colorless mana
Show steps
- Cast Stonework Puma by paying {3}.
- When Stonework Puma enters, Haru triggers, targeting Stonework Puma as it is a land due to Toph.
- Activate Ashnod's Altar by sacrificing Stonework Puma.
- When Stonework Puma dies, Haru triggers, returning Stonework Puma from your graveyard to the battlefield tapped.
- When Stonework Puma enters, Haru triggers, targeting Stonework Puma as it is a land due to Toph.
- Repeat from step 3.
Combo 14 with Stonework Puma + Goblin Bombardment
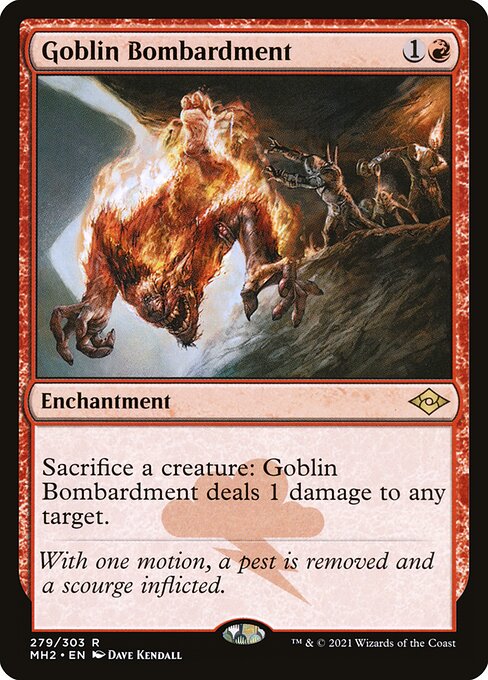
Results:
Infinite LTB
· Infinite ETB
· Infinite sacrifice triggers
· Infinite death triggers
· Infinite landfall triggers
· Infinite damage
Show steps
- Cast Stonework Puma by paying {3}.
- When Stonework Puma enters, Haru triggers, targeting Stonework Puma as it is a land due to Toph.
- Activate Goblin Bombardment by sacrificing Stonework Puma.
- When Stonework Puma dies, Haru triggers, returning Stonework Puma from your graveyard to the battlefield tapped.
- When Stonework Puma enters, Haru triggers, targeting Stonework Puma as it is a land due to Toph.
- Resolve the Goblin Bombardment ability.
- Repeat from step 3.
Combo 15 with Stonework Puma + Blasting Station
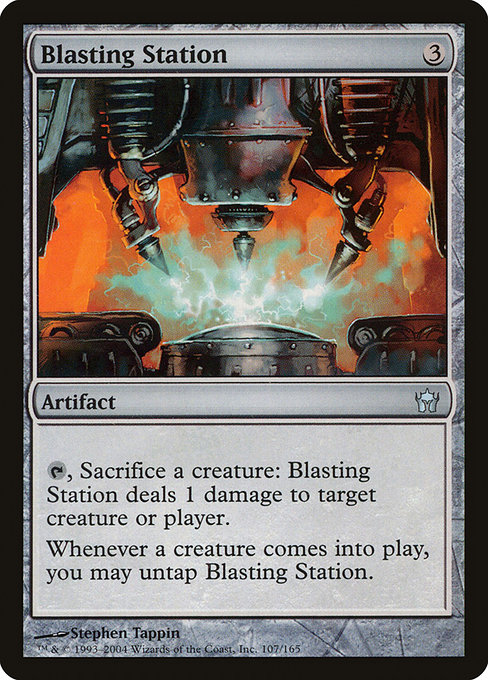
Results:
Infinite LTB
· Infinite ETB
· Infinite sacrifice triggers
· Infinite death triggers
· Infinite landfall triggers
· Infinite damage
Show steps
- Cast Stonework Puma by paying {3}.
- When Stonework Puma enters, Blasting Station and Haru trigger.
- Resolve the Haru trigger, targeting Stonework Puma as it is a land due to Toph.
- Resolve the Blasting Station trigger, untapping it.
- Activate Blasting Station by tapping it and sacrificing Stonework Puma.
- When Stonework Puma dies, Haru triggers, returning Stonework Puma from your graveyard to the battlefield tapped.
- When Stonework Puma enters, Blasting Station and Haru trigger.
- Resolve the Haru trigger, targeting Stonework Puma as it is a land due to Toph.
- Resolve the Blasting Station trigger, untapping it.
- Resolve the Blasting Station ability from step 5.
- Repeat from step 5.
Combo 16 with Firdoch Core + Zuran Orb
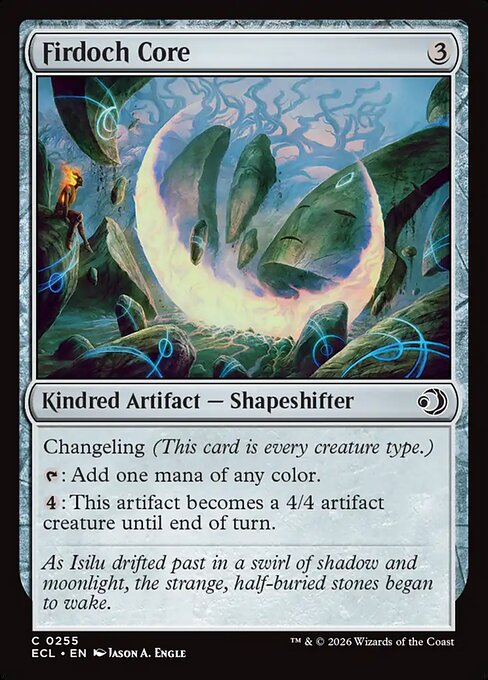
Results:
Infinite LTB
· Infinite death triggers
· Infinite landfall triggers
· Infinite lifegain
· Infinite lifegain triggers
· Infinite sacrifice triggers
Show steps
- Cast Firdoch Core by paying {3}.
- When Firdoch Core enters, Haru triggers, earthbending Firdoch Core, as it's a land due to Toph.
- Activate Zuran Orb by sacrificing Firdoch Core.
- When Firdoch Core dies, Haru triggers, returning Firdoch Core from your graveyard to the battlefield.
- When Firdoch Core enters, Haru triggers, earthbending Firdoch Core, as it's a land due to Toph.
- Resolve the Zuran Orb ability.
- Repeat from step 3.
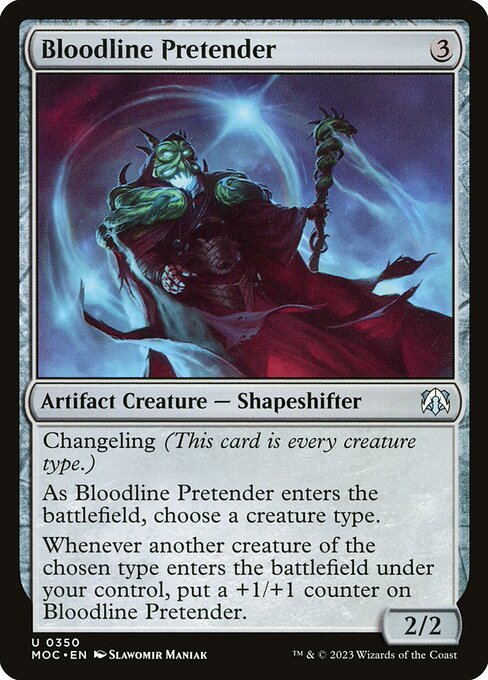
Combo 17 with Zuran Orb + Bloodline Pretender
Results:
Infinite LTB
· Infinite ETB
· Infinite sacrifice triggers
· Infinite death triggers
· Infinite lifegain triggers
· Infinite lifegain
· Infinite landfall triggers
Show steps
- Cast Bloodline Pretender by paying {3}.
- When Bloodline Pretender enters, Haru triggers, targeting Bloodline Pretender as it is a land due to Toph.
- Activate Zuran Orb by sacrificing Bloodline Pretender.
- When Bloodline Pretender dies, Haru triggers, returning Bloodline Pretender from your graveyard to the battlefield tapped.
- When Bloodline Pretender enters, Haru triggers, targeting Bloodline Pretender as it is a land due to Toph.
- Resolve the Zuran Orb ability.
- Repeat from step 3.
Combo 18 with Goblin Bombardment + Universal Automaton
Results:
Infinite LTB
· Infinite ETB
· Infinite sacrifice triggers
· Infinite death triggers
· Infinite damage
· Infinite landfall triggers
Show steps
- Cast Universal Automaton by paying {1}.
- When Universal Automaton enters, Haru triggers, targeting Universal Automaton as it is a land due to Toph.
- Activate Goblin Bombardment by sacrificing Universal Automaton.
- When Universal Automaton dies, Haru triggers, returning Universal Automaton from your graveyard to the battlefield tapped.
- When Universal Automaton enters, Haru triggers, targeting Universal Automaton as it is a land due to Toph.
- Resolve the Goblin Bombardment ability.
- Repeat from step 3.
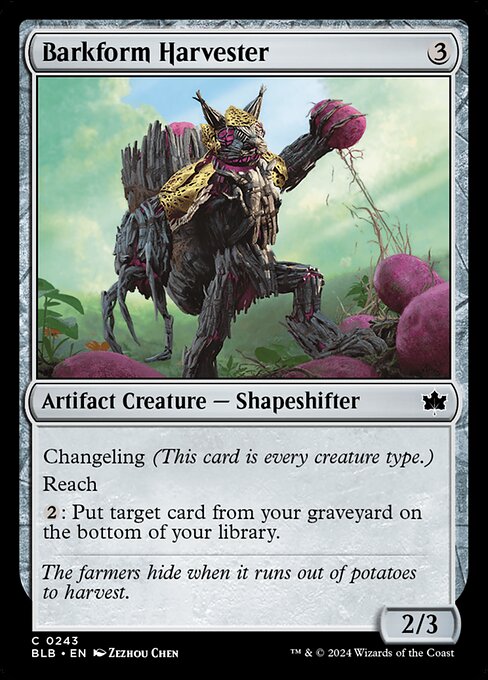
Combo 19 with Zuran Orb + Barkform Harvester
Results:
Infinite LTB
· Infinite ETB
· Infinite sacrifice triggers
· Infinite death triggers
· Infinite lifegain triggers
· Infinite lifegain
· Infinite landfall triggers
Show steps
- Cast Barkform Harvester by paying {3}.
- When Barkform Harvester enters, Haru triggers, targeting Barkform Harvester as it is a land due to Toph.
- Activate Zuran Orb by sacrificing Barkform Harvester.
- When Barkform Harvester dies, Haru triggers, returning Barkform Harvester from your graveyard to the battlefield tapped.
- When Barkform Harvester enters, Haru triggers, targeting Barkform Harvester as it is a land due to Toph.
- Resolve the Zuran Orb ability.
- Repeat from step 3.
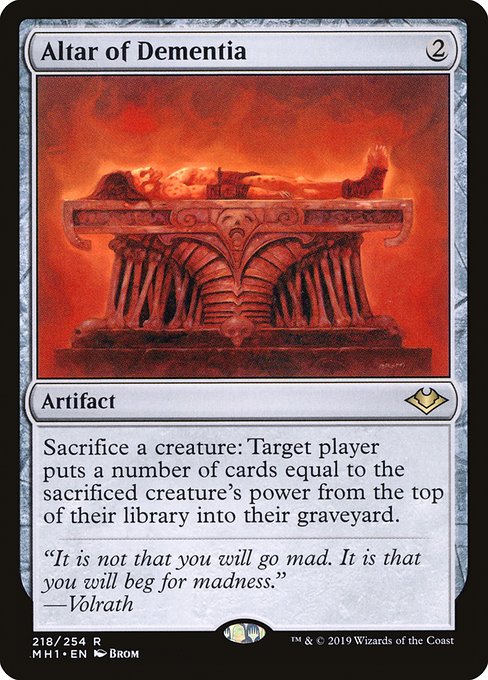
Combo 20 with Altar of Dementia + Universal Automaton
Results:
Infinite LTB
· Infinite ETB
· Infinite sacrifice triggers
· Infinite death triggers
· Infinite mill
· Infinite self-mill
· Infinite landfall triggers
Show steps
- Cast Universal Automaton by paying {1}.
- When Universal Automaton enters, Haru triggers, targeting Universal Automaton as it is a land due to Toph.
- Activate Altar of Dementia by sacrificing Universal Automaton.
- When Universal Automaton dies, Haru triggers, returning Universal Automaton from your graveyard to the battlefield tapped.
- When Universal Automaton enters, Haru triggers, targeting Universal Automaton as it is a land due to Toph.
- Resolve the Altar of Dementia ability.
- Repeat from step 3.
Explore These Cards
Buy Haru, Hidden Talent on TCGPlayer
Buy on Amazon
As an Amazon Associate and TCGPlayer affiliate I earn from qualifying purchases.
Buy Toph, the First Metalbender on TCGPlayer
Buy on Amazon
As an Amazon Associate and TCGPlayer affiliate I earn from qualifying purchases.