 +
+
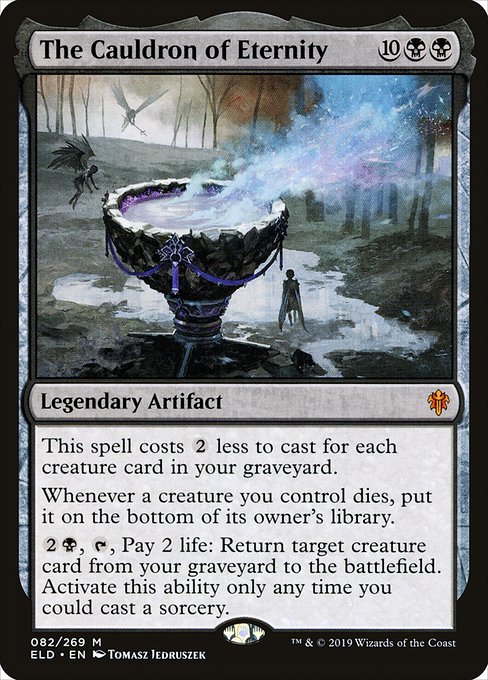
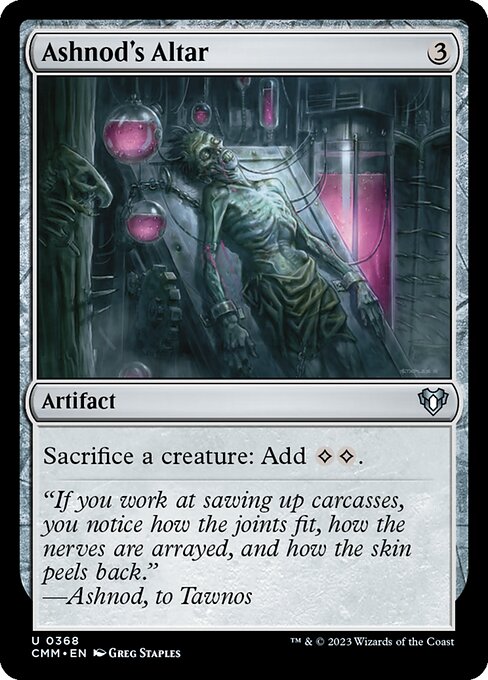
Ashnod's Altar + The Cauldron of Eternity Combos
7 known combos featuring both cards in Commander
Infinite ETB
Infinite LTB
Infinite sacrifice triggers
Infinite colorless mana
Infinite death triggers
Combo 1 with Grenzo, Dungeon Warden
Also requires:
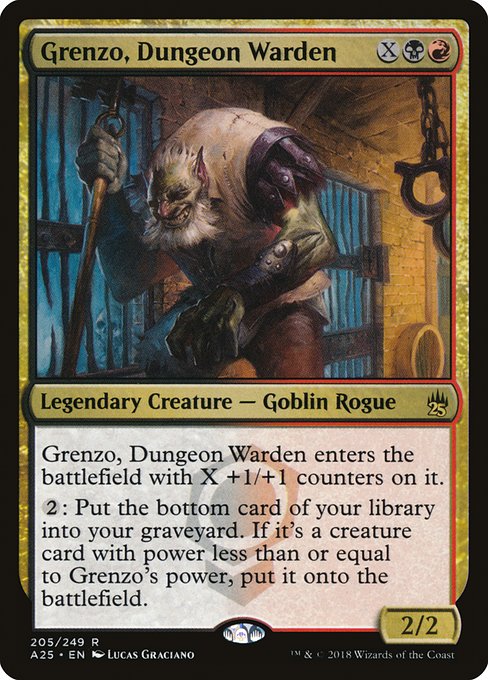 Grenzo, Dungeon Warden
Grenzo, Dungeon Warden
Results:
Infinite death triggers
· Infinite ETB
· Infinite LTB
· Infinite sacrifice triggers
Steps
- Activate Grenzo by paying {2}.
- Holding priority, activate Ashnod's Altar by sacrificing Grenzo, adding {C}{C}.
- When Grenzo dies, The Cauldron of Eternity triggers, putting Grenzo from your graveyard onto the bottom of your library.
- Resolve the Grenzo ability from step 1, causing you to put Grenzo from the bottom of your library into your graveyard, and then putting Grenzo onto the battlefield.
- Repeat.
Combo 2 with Verdant Succession
Also requires:
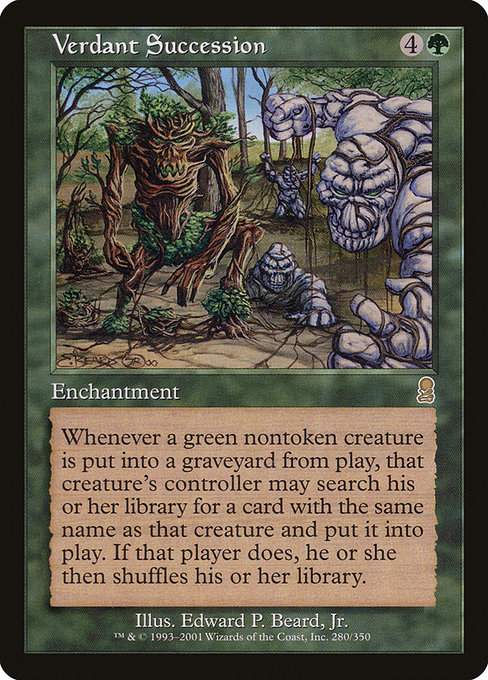 Verdant Succession
Verdant Succession
Results:
Infinite colorless mana
· Infinite death triggers
· Infinite ETB
· Infinite LTB
· Infinite sacrifice triggers
Show steps
- Activate Ashnod's Altar by sacrificing the creature, adding {C}{C}.
- The Cauldron of Eternity and Verdant Succession both trigger.
- Resolve The Cauldron of Eternity trigger first, putting the creature on the bottom of your library.
- Resolve the Verdant Succession trigger, returning the creature to the battlefield.
- Repeat.
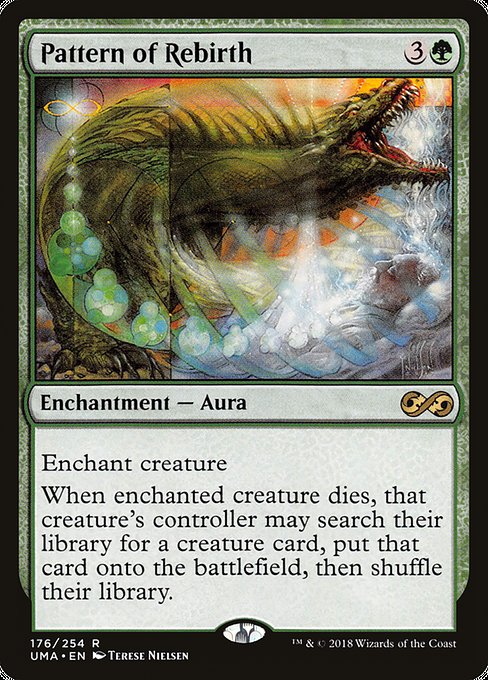
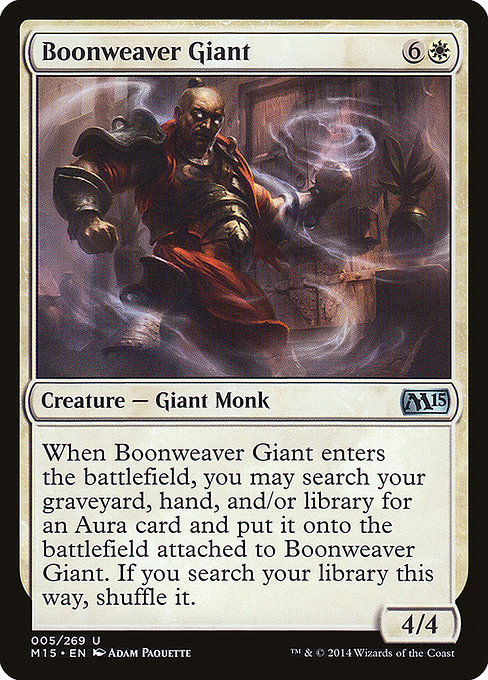
Combo 3 with Pattern of Rebirth + Boonweaver Giant
Results:
Infinite colorless mana
· Infinite death triggers
· Infinite ETB
· Infinite LTB
· Infinite sacrifice triggers
Show steps
- Activate Ashnod's Altar by sacrificing Boonweaver Giant, adding {C}{C}.
- When Boonweaver Giant dies, The Cauldron of Eternity and Pattern of Rebirth trigger.
- Resolve the Cauldron of Eternity trigger, putting Boonweaver Giant on the bottom of your library from your graveyard.
- Resolve the Pattern of Rebirth trigger, putting Boonweaver Giant from your library onto the battlefield.
- When Boonweaver Giant enters the battlefield, it triggers, returning Pattern of Rebirth from your graveyard to the battlefield attached to Boonweaver Giant.
- Repeat.
Combo 4 with Pattern of Rebirth + Danitha, Benalia's Hope

Results:
Infinite colorless mana
· Infinite death triggers
· Infinite ETB
· Infinite LTB
· Infinite sacrifice triggers
Show steps
- Activate Ashnod's Altar by sacrificing Danitha, adding {C}{C}.
- When Danitha dies, The Cauldron of Eternity and Pattern of Rebirth trigger.
- Resolve the Cauldron of Eternity trigger, putting Danitha on the bottom of your library from your graveyard.
- Resolve the Pattern of Rebirth trigger, putting Danitha from your library onto the battlefield.
- When Danitha enters the battlefield, it triggers, returning Pattern of Rebirth from your graveyard to the battlefield attached to Danitha.
- Repeat.
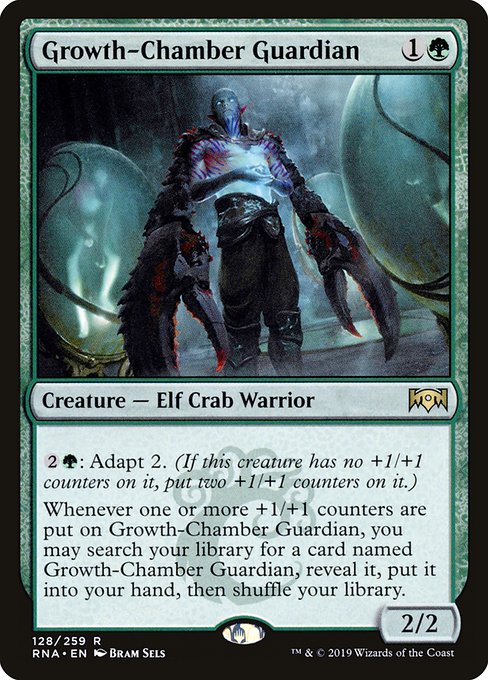
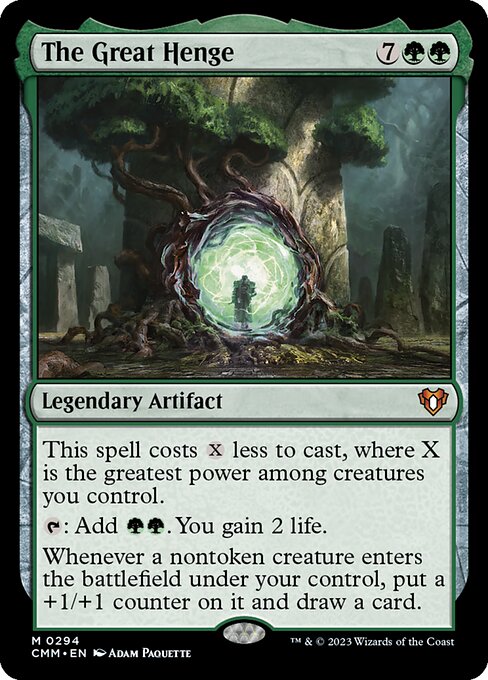
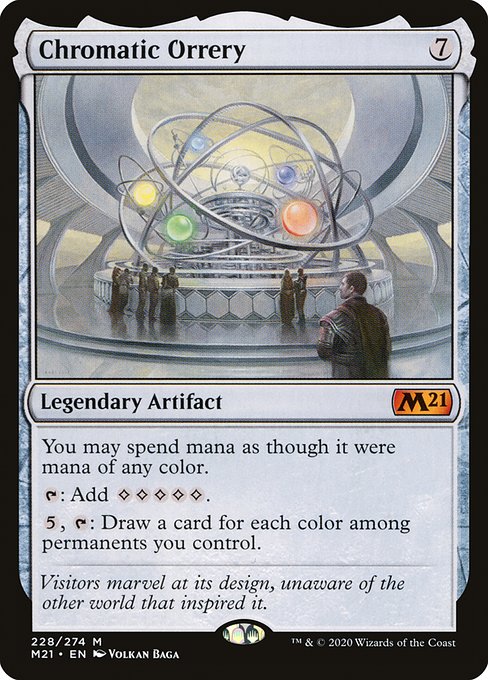
Combo 5 with Growth-Chamber Guardian + The Great Henge + Chromatic Orrery
Results:
Infinite card draw
· Infinite colorless mana
· Infinite ETB
· Infinite LTB
· Infinite sacrifice triggers
· Infinite storm count
· Infinite colored mana
Show steps
- Cast Growth-Chamber Guardian by paying {1}{G}.
- Growth-Chamber Guardian enters the battlefield, triggering The Great Henge, putting a +1/+1 counter on Growth-Chamber Guardian and drawing you a card.
- Growth-Chamber Guardian triggers, holding priority, activate Ashnod's Altar by sacrificing Growth-Chamber Guardian, adding {C}{C}.
- Growth-Chamber Guardian dies, triggering The Caludron of Eternity, putting Growth-Chamber Guardian on the bottom of your library from your graveyard.
- Resolve the Growth-Chamber Guardian trigger from step 3, searching your library for Growth-Chamber Guardian and putting it into your hand.
- Repeat.
Combo 6 with Growth-Chamber Guardian + The Great Henge + Mycosynth Lattice

Results:
Infinite card draw
· Infinite colorless mana
· Infinite ETB
· Infinite LTB
· Infinite sacrifice triggers
· Infinite storm count
· Infinite colored mana
Show steps
- Cast Growth-Chamber Guardian by paying {1}{G}.
- Growth-Chamber Guardian enters the battlefield, triggering The Great Henge, putting a +1/+1 counter on Growth-Chamber Guardian and drawing you a card.
- Growth-Chamber Guardian triggers, holding priority, activate Ashnod's Altar by sacrificing Growth-Chamber Guardian, adding {C}{C}.
- Growth-Chamber Guardian dies, triggering The Caludron of Eternity, putting Growth-Chamber Guardian on the bottom of your library from your graveyard.
- Resolve the Growth-Chamber Guardian trigger from step 3, searching your library for Growth-Chamber Guardian and putting it into your hand.
- Repeat.
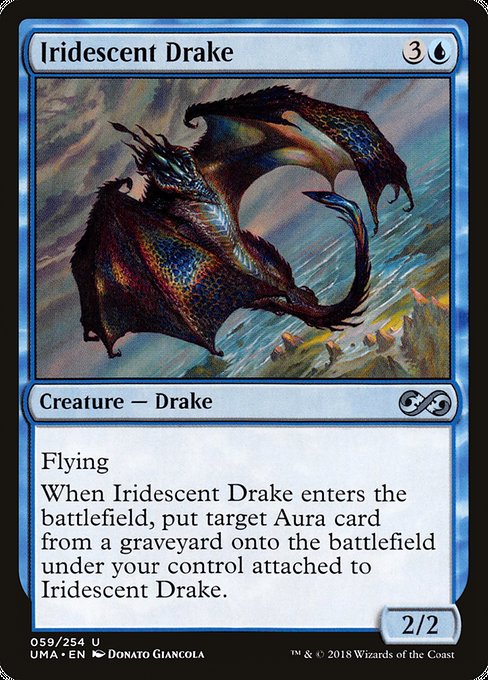
Combo 7 with Pattern of Rebirth + Iridescent Drake
Results:
Infinite colorless mana
· Infinite death triggers
· Infinite ETB
· Infinite LTB
· Infinite sacrifice triggers
Show steps
- Activate Ashnod's Altar by sacrificing Iridescent Drake, adding {C}{C}.
- When Iridescent Drake dies, The Cauldron of Eternity and Pattern of Rebirth trigger.
- Resolve the Cauldron of Eternity trigger, putting Iridescent Drake on the bottom of your library from your graveyard.
- Resolve the Pattern of Rebirth trigger, putting Iridescent Drake from your library onto the battlefield.
- When Iridescent Drake enters the battlefield, it triggers, returning Pattern of Rebirth from your graveyard to the battlefield attached to Iridescent Drake.
- Repeat.
Explore These Cards
Buy Ashnod's Altar on TCGPlayer
Buy on Amazon
As an Amazon Associate and TCGPlayer affiliate I earn from qualifying purchases.
Buy The Cauldron of Eternity on TCGPlayer
Buy on Amazon
As an Amazon Associate and TCGPlayer affiliate I earn from qualifying purchases.